 Brewblox
Getting Started
This guide describes how to install the Brewblox system on a Raspberry Pi. The default device for the Brewblox system is the Spark. To preview Brewblox, you can use a simulated Spark.
For an explanation of how to combine the various Spark Blocks, see the Brewblox control chains page.
The default configuration uses a single Spark controller. The services guides describe how to get started using more devices.
What you will need
Always:
- Laptop or desktop computer
- Raspberry Pi minicomputer (model 3 or later)
- Raspberry Pi power supply cable
- MicroSD card
- MicroSD card reader
- Wifi network or ethernet cable
When connecting the BrewPi Spark
- BrewPi Spark
- (Spark 2 or 3) USB to Micro-USB cable
- (Spark 4) USB to USB-C cable
Step 1: Format the microSD card
Download the Raspberry Pi Imager
Insert your microSD card in the card reader, and connect the reader to your computer.
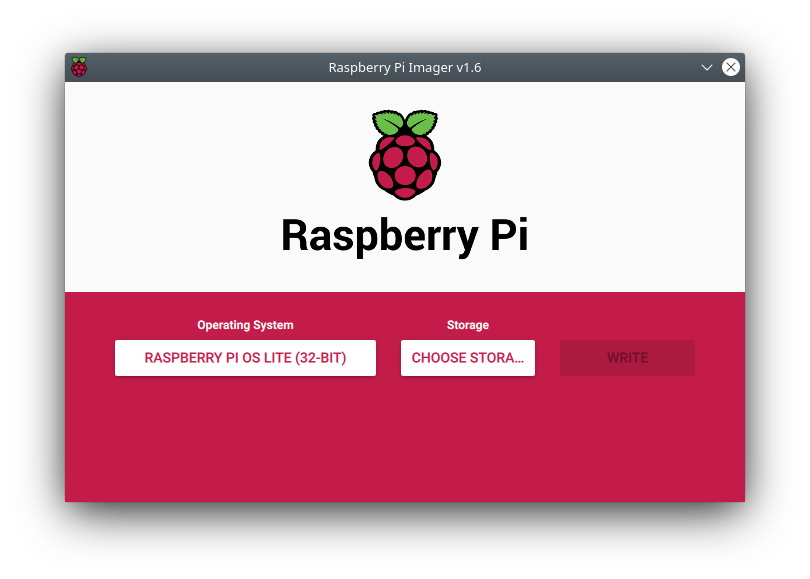
Select Raspberry Pi OS Lite (32-bit), select your SD card, and hit 'Ctrl-Shift-X' for the advanced menu. The advanced menu is available in the Raspberry Pi Imager v1.6 and higher.
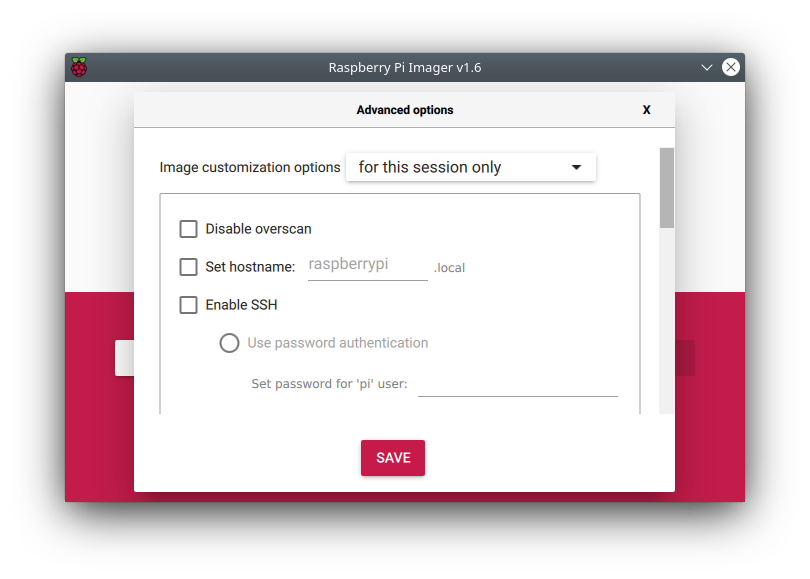
In the advanced menu you want to define a few settings:
- Set hostname: a hostname is used to easily connect to your Pi on your network. Clear and short names work best. The default hostname is
raspberrypi. - Enable SSH: you connect remotely to the terminal of your Pi through SSH. Select Use password authentication and set your password.
- Configure wifi: here you configure the network name (SSID) & password of your wifi. Set the wifi country setting to your country to match the wifi channels of your access point.
- Set username and password: it's important to have a custom username and password, even inside your local network.
- Set locale settings: define your time zone and keyboard layout.
Hit SAVE to exit the menu, and WRITE to write the image to your SD card.
For more information, see the official Raspberry Pi install guide.
Step 2: Connect to the Raspberry Pi
WARNING
Make sure the power supply is disconnected at this point.
We recommend to use the Pi as a headless device: no monitor, no keyboard. Running a desktop environment takes memory and processing power on the Pi, and reduces the reliability of the system.
The UI is viewed in your browser anyway, and you can use SSH to remotely connect to your Pi's terminal.
On your desktop computer, you need an SSH client. On Linux and OSX, the ssh command is available by default. On Windows, you can install Terminal from the Windows Store.
If you're unfamiliar with SSH, this tutorial might help.
After you installed your SSH client, insert the microSD card into your Pi, and connect the power supply. The Pi will start automatically.
Wait for the Pi to finish starting up, and connect to it using your SSH client. The default user name is pi, and the hostname and password are what you defined in the RPi Imager advanced menu at Step 1. The default hostname raspberrypi is used in the example below.
ssh pi@raspberrypiIf the hostname of your Pi is not recognized on your network, you can use the instructions below to get the IP address of your Pi.
Getting the IP address of your Pi
Connecting to your Pi using SSH requires you to know its address. Often, your network already knows the address of your Pi by its hostname. If you haven't changed it at Step 1, the default hostname of your Pi is raspberrypi.
If using the name doesn't work, there are multiple tools to discover the IP address.
We like the Fing app (available on both iOS and Android), but you can also use your router's web interface to find the addresses of all connected devices. A tutorial for that can be found here.
Step 3: Install Brewblox
To execute the commands that follow, copy them and paste them in your SSH client. Trying to type them yourself is frustrating and error prone.
For Windows Terminal, the default shortcuts to copy/paste in a terminal window are ctrl+shift+C and ctrl+shift+V. You can also right click on the terminal window, and select the desired option from the dropdown menu.
To install package updates:
sudo apt update && sudo apt upgrade -y
sudo reboot
The sudo reboot command will restart your Pi. Reconnect the SSH client to continue.
To download and run the Brewblox installer:
wget -qO - https://www.brewblox.com/install | bashAfter the installation is done, the Pi will restart again. Reconnect the SSH client to continue.
By default, ~/brewblox is used as install directory.
While you wait: Command line basics
For the next steps, a basic understanding of Linux commands makes things easier. We'll stick to the basics, and assume the default settings on a Raspberry Pi.
After logging in over SSH, you'll see this text in front of your cursor:
pi@raspberrypi:~ $This is the shell prompt, and it consists of three parts:
piis the current user.piis the default user for a Raspberry Pi.raspberrypiis the computer hostname. Again,raspberrypiis the default.~is the current directory.
~ is a special character for the user home directory. When opening a new SSH terminal, you will start in this directory. You can use the pwd command to show the complete path, replacing the special character with directory names.
For example, on a Raspberry Pi:
pi@raspberrypi:~ $ pwd
/home/pi
pi@raspberrypi:~ $
By default, Brewblox is installed in the ./brewblox directory. This is a relative path: . means "current directory". The absolute path for this directory is ~/brewblox or /home/pi/brewblox.
You can change directories by using the cd command. This can be used with either relative, or absolute paths. After you change directory, the current directory component of your shell prompt will change.
For example, after using cd ./brewblox, your shell prompt will be:
pi@raspberrypi:~/brewbloxYou can navigate back to the home directory by using either one of these commands:
cd ~cd .... is another special character. It means "one directory up".
Examples:
pi@raspberrypi:~/brewblox $ cd ..
pi@raspberrypi:~ $pi@raspberrypi:~/brewblox/deeply/nested/subdirectory $ cd ..
pi@raspberrypi:~/brewblox/deeply/nested $If you'd like some more explanation, this guide to linux commands explains how to use the most common commands on a Raspberry Pi.
Step 4: Spark setup
Spark 2 and 3
For this step, your Spark should be connected to your Raspberry Pi over USB.
Navigate to the Brewblox install directory (default: cd ~/brewblox), and run this command:
brewblox-ctl flashFollow the instructions until the menu exits.
If you are upgrading an older Spark, you may need to flash the bootloader.
Only if the LED is blinking blue after the firmware is flashed, run:
brewblox-ctl particle -c flash-bootloaderFor now, keep the USB cable connected. You can configure Wifi in the UI during Step 6.
To add a Spark service, run:
brewblox-ctl add-sparkSpark 4
To use the Spark 4, it needs to be connected to your network. Ethernet and Wifi are both supported.
Setting up ethernet is as simple as plugging in a cable. Wifi credentials are set over Bluetooth, using the ESP BLE Provisioning app. The app is available on Android and iOS.
To set Wifi credentials:
- Download the ESP BLE Provisioning app.
- Enable Bluetooth in your phone settings.
- Press and hold the OK button on the Spark for five seconds. It will beep twice.
- The Spark is ready for provisioning if its buttons are blinking blue.
- Open the app.
- Click Provision New Device.
- Click I don't have a QR code.
- Select the PROV_BREWBLOX_ device.
- Select your Wifi network, and enter your credentials.
The app will now set Wifi credentials for your Spark. An IP address will be shown in the top left corner of the Spark display.
To add a Spark service, run:
brewblox-ctl add-sparkSpark simulator
The Spark service comes with a built-in simulator. This simulator won't control physical actuators or use OneWire sensors, but also doesn't need a Spark controller to function.
The Spark simulator is built into the Spark service.
To add a Spark simulator service, run:
brewblox-ctl add-spark --simulationFor more information on the simulator, and on how to later convert it to a service for a real controller, see the spark sim page;
Step 5: Start the system
To list all possible commands, navigate to the Brewblox install directory (default: cd ~/brewblox), and run:
brewblox-ctl --helpExample output
pi@raspberrypi:~ $ cd brewblox
pi@raspberrypi:~/brewblox$ brewblox-ctl --help
Usage: python -m brewblox_ctl [OPTIONS] COMMAND [ARGS]...

  The Brewblox management tool.

  Example calls:

      brewblox-ctl install
      brewblox-ctl --quiet down
      brewblox-ctl --verbose up

Options:
  -y, --yes             Do not prompt to confirm commands.
  -d, --dry, --dry-run  Dry run mode: echo commands instead of running them.
  -q, --quiet           Show less detailed output.
  -v, --verbose         Show more detailed output.
  --color / --no-color  Format messages with unicode color codes.
  --help                Show this message and exit.

Commands:
  up              Start all services.
  down            Stop all services.
  restart         Recreates all services.
  follow          Show logs for one or more services.
  kill            Stop and remove all containers on this host.
  install         Install Brewblox and its dependencies.
  makecert        Generate a self-signed SSL certificate.
  env             List, get, or set env values.
  update          Download and apply updates.
  update-ctl      Download and update brewblox-ctl itself.
  discover-spark  Discover available Spark controllers.
  add-spark       Create or update a Spark service.
  add-tilt        Create a service for the Tilt hydrometer.
  add-plaato      Create a service for the Plaato airlock.
  add-node-red    Create a service for Node-RED.
  service         Edit or remove services in docker-compose.yml.
  flash           Flash Spark firmware over USB.
  wifi            Configure Spark Wifi settings.
  particle        Start a Docker container with access to the Particle CLI.
  log             Generate and share log file for bug reports.
  fix             Fix configuration on the host system.
  database        Database migration commands.
  backup          Save or load backups.
  snapshot        Save or load snapshots.
pi@raspberrypi:~/brewblox$
You can use brewblox-ctl to easily manage your system, and perform common actions. Run the following command to start your system:
brewblox-ctl upAfter the project is done starting up, you can use the Brewblox UI at http://raspberrypi (or your Raspberry Pi's IP address) to configure and monitor your Spark.
TIP
Because we're using a local (self-signed) SSL certificate, your browser will display a warning the first time you visit the page when using HTTPS.
There's no need to panic. Click advanced, and proceed to the page.
To permanently trust this certificate, follow the instructions at Admin Page -> General Settings -> Install SSL Cert. 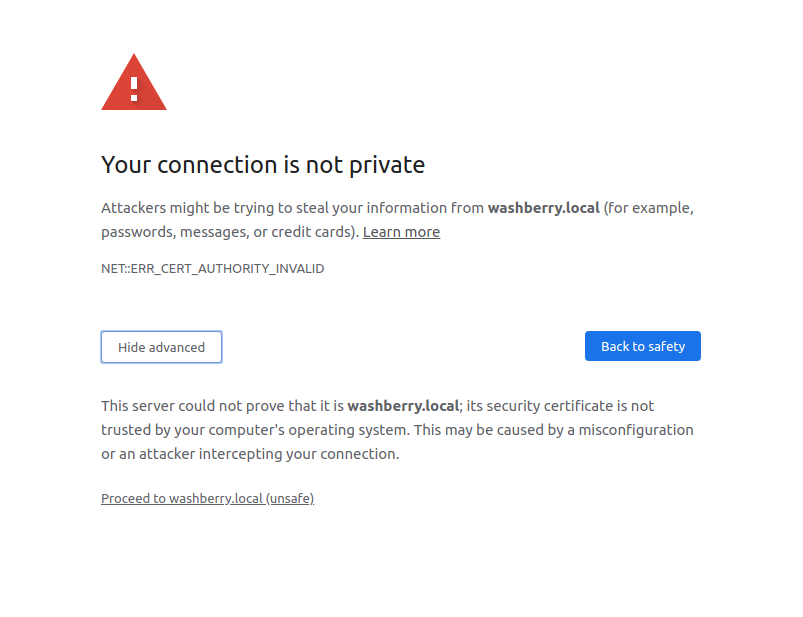
Step 6: Use the system
Brewblox is now installed and running. The next step is to put it in charge of your fridges, kettles, and conicals.
You can build your configuration from scratch, or use one of the wizards. To start a wizard, click the big Get Started button, and select the Quick Start option.
If you are upgrading from the old BrewPi software, the Fermentation fridge wizard will replicate its functionality.
To edit the settings of your system and controllers, go to the Admin page, accessible through the sidebar. For example, this page can be used to set your preferred temperature unit and timezone.
Later: Updating
Brewblox receives regular updates. Whenever a new update is released, the release notes are posted on the forum, and added to the overview.
To update, close the UI, and run the following command:
brewblox-ctl updateAfter the command is done, visit the UI page to verify everything is up and running again. The UI will then notify you if a new firmware version is available. Click on the notification to install the new firmware.